Lambda functions are really cool. They are tiny cloud-based compute instances which get created and destroyed on each API call. They automatically scale and can be distributed across the globe and executed close to the user which can deliver very fast response times. In this guide, you will learn how to deploy a basic hello world function and how to link it to a domain name which you already own.
Prerequisites
-
Amazon AWS Account
-
A domain name with configurable DNS (I’m using Cloudflare)
For this tutorial, I will be deploying a simple lambda function to my custom domain: api-helloworld.oscars.dev.
Step 1 - Create lambda function
# initialise boilerplate AWS Lambda project
sam init
...
> 1 - AWS Quick Start Templates
> 1 - Hello World Example
> Use popular package type? (Python and zip) [y/N]: N
> 10 - nodejs16.x
> 1 - Zip
> 2 - Hello World Example TypeScript
> Project name: hello-world
# enter the directory and build the project
cd hello-world

# build project
sam build --beta-features

# deploy project to aws
sam deploy --guided
...
> Stack Name: hello-world
> AWS Region: eu-west-1
[..."yes" for everything else]
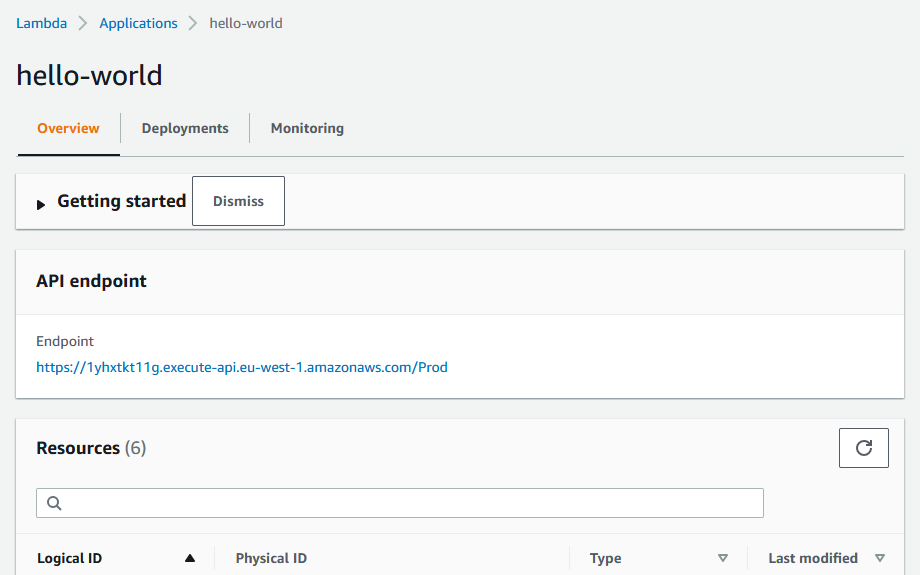
Your AWS Lambda function is now deployed to the cloud! You can see your new app under your console.
Clicking on the app will then show you the URL from where the function can be invoked. In my case, I can directly execute my function with the URL below.
Step 2 - Configure Your Domain
So we have a function which we can invoke from an API endpoint. great! But how do we link a domain to that?
Certificate Manager
Head to Certificate Manager in your AWS console and then click on request in the top-right to request a new certificate.
Certificate type > Select “Request public certificate” and click next.
Input the domain name which you want (from a domain which you own), select DNS validation and then press Request.
After proceeding, you should be taken back to the certificates list where after refreshing, you should see your newly requested certificate with a “pending validation”. We’re not done yet!
Click on the certificate to get to the detailed page. In the “Domains” section you should see two columns named CNAME Name and CNAME Value as below. Take a note of these values. you will need them later!
If your table is not displaying values like this, wait a little bit and then refresh the page. These entries normally get populated after a minute or so.
Step 3 - Validate Certificate with DNS
Go into your DNS settings for the domain you would like to configure. In my case I am using Cloudflare as it is free and it makes it really easy for me to manage my domains.
Add a new CNAME record to your DNS and copy and paste the NAME and VALUE data from previously. After you hit confirm, you should then see a DNS entry which looks similar to this:
Wait for a bit
Go and make yourself a cup of tea as this will take a few minutes. It can depend on your DNS provider but it shouldn’t take longer than an hour. When the certificate is validated, you should see a green tick by the entry in Certificate manager.
Step 4 - Link your function
When you’re all validated, go ahead and open up API Gateway from your AWS dashboard.
Along the left bar, go to Custom domain names and then click Create.
In Domain name, put the same domain you got the certificate for earlier. Leave everything else as default and select the corresponding certificate from the ACM Certificate dropdown.
Press Create domain name and then under API Mappings, create a new mapping with your function and the desired stage (Prod).
Step 5 - Find the correct URL
This bit caught me out when I first tried to set up a custom domain. The URL displayed on the function control panel isn’t actually the one which you use to forward the requests to.
Open up a terminal and execute the following command to receive a response object with details about your domain.
aws apigateway get-domain-name --domain-name "<YOUR DOMAIN>"
...
{
    "domainName": "<DOMAIN_NAME>",
    "certificateUploadDate": "<Date>",
    "regionalDomainName": "<API_GATEWAY_ID>.execute-api.eu-west-1.amazonaws.com",
    "regionalHostedZoneId": "...",
    "regionalCertificateArn": "arn:aws:acm:eu-west-1:<ACCOUNT>:certificate/<CERT_ID>",
    "endpointConfiguration": {
        "types": [
            "REGIONAL"
        ]
    },
		"domainNameStatus": "AVAILABLE",
}
If your response looks like this, then it's looking good! Copy your “regionalDomainName”. You will need this for the final step.
Step 6 - Link DNS Record
Return to your DNS provider once again and another CNAME record (last one this time, I promise) with your subdomain as the name (in my case api-helloworld) and your Target/Value as the regionalDomainName from earlier.
Finishing up
Maybe make yourself another cup of tea while the DNS changes take effect. When the changes have applied, you should be able to execute your function via your domain!


